
How to fold a silk pocket square: Three-peak fold
- Ellen Meiselman
- Apr 16, 2022
- 2 min read

Updated: May 30, 2022

Learn to fold this elegant shape with or without a pocket square holder.
Tip 1: Do most of your folding with the help of an iron until you get a feel for working with silk. It is not necessary to have razor-flat edges, but it helps to press the fold into place at first. Work slowly, fold precisely, and iron each folded edge as you go, so it stays neatly in position.
Tip 2: You can “erase” a fold by putting a few drops of water on your finger, and drawing it along the folded crease on the back of the pocket square to dampen the crease. Then, also on the back of the fabric, press with a medium hot iron. Once the fabric is mostly dry, flip it over, and press from the front . It is OK to use steam.
I have shown the use of a pocket square holder toward the end, but that is optional.
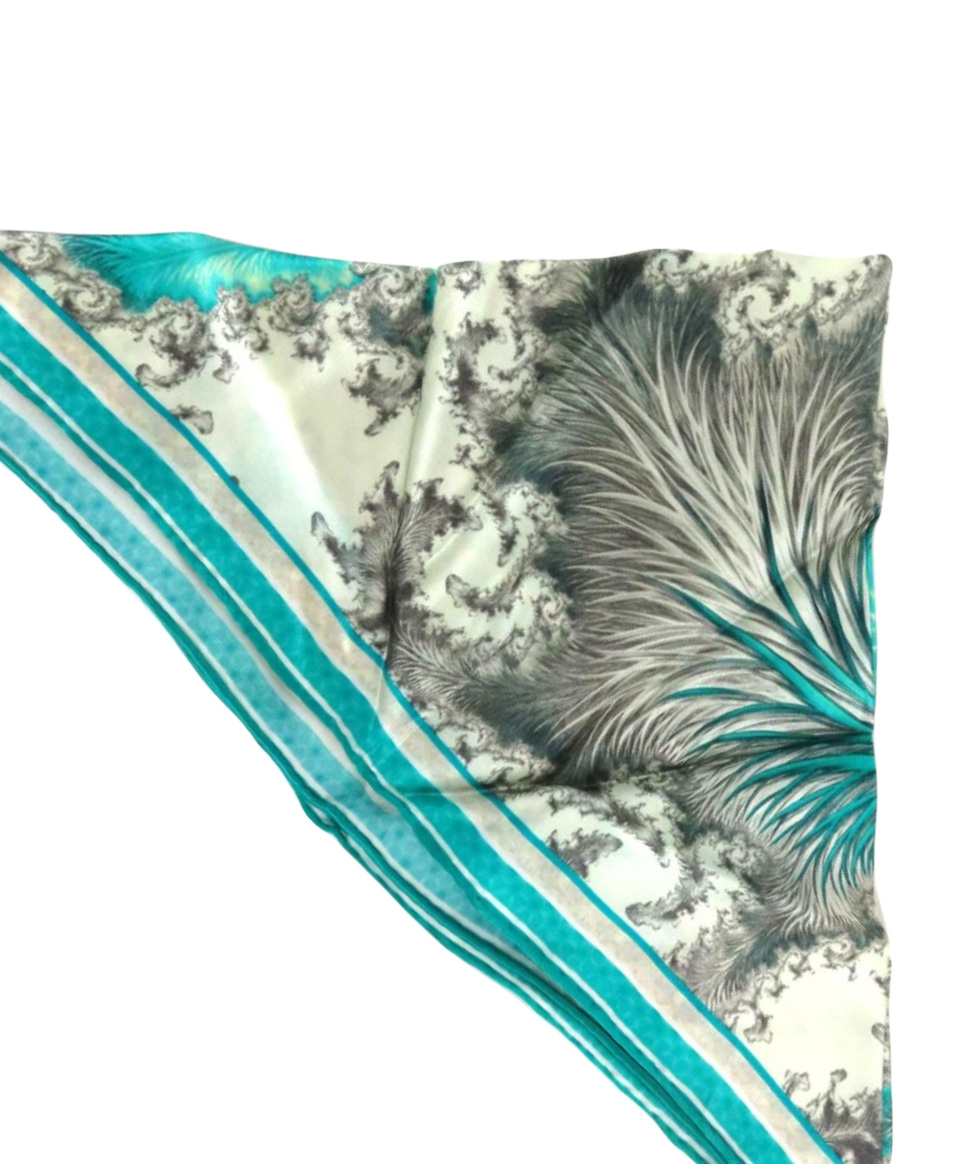
Step 1: Fold the pocket square diagonally in half so it forms a triangle.


Step 2. Fold the triangle in half so the right-hand point lies over the left-hand point.

Step 3. Rotate the resulting triangle so the middle point is at the top. The middle point will be the biggest peak of the mountain.

Step 4. Now fold up the right hand point so it overlays the large peak in the middle.

Step 5. Do the same with the left hand point - fold it over the center peak as shown.

Step 6. Now fold the sides in, to fit the pocket width. Fold the right side across the midline.
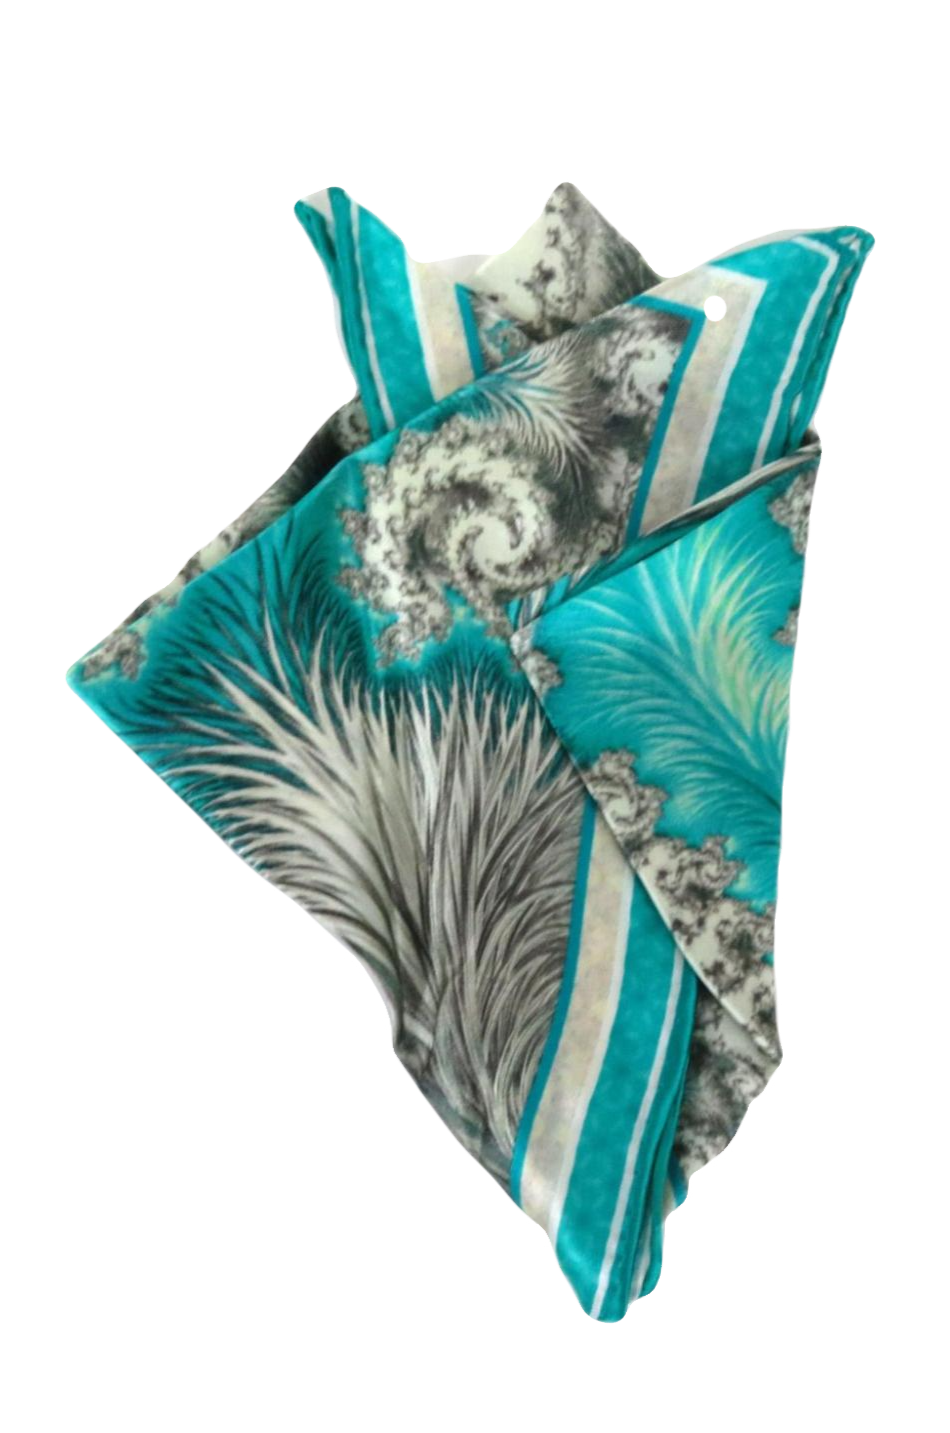
Step 7. Do the same with the left side. If you are not using a pocket square holder, just slip this into the suit pocket and adjust the height as needed.

Step 8. If you are using a pocket square holder, feed the tail end of the pocket square through the top slot of the holder from behind.

Step 9. Weave it through the other slots as shown.
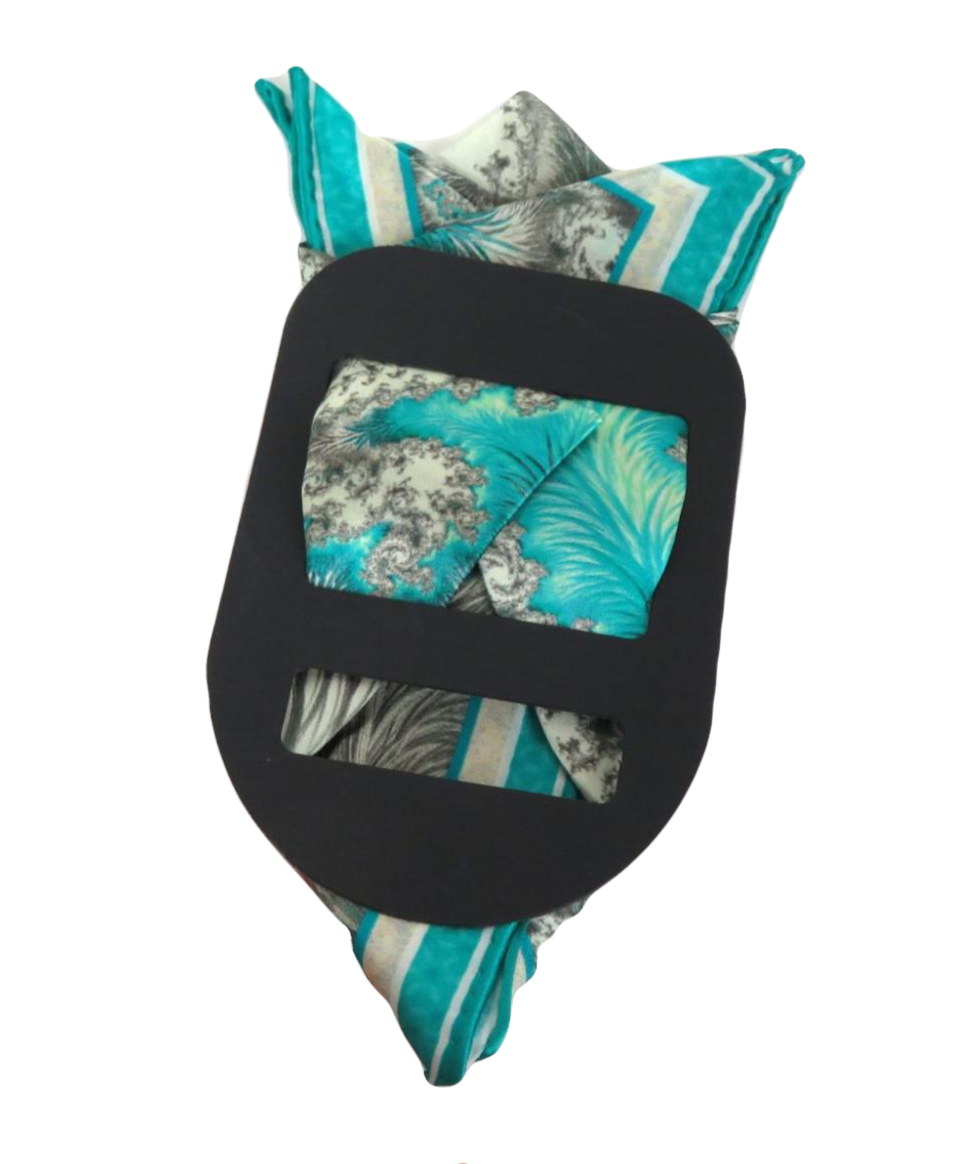

Step 10. Do a final adjustment of the height of the fold above the holder by pulling it down a little.

Step 11. Insert the pocket square and holder into the suit pocket.

Step 12. Make final adjustments to the position and height above the pocket.


Comments